
Keycyte PAM 3.2 · User Guide
Settings
Your personal settings are saved for your account and apply in every browser that you sign in from.
To open the settings:
- In the server tree, click Settings.
The Settings tab has three pages: Language, Terminal Settings and Custom Menu.
Tip
To switch the Client Panel between the dark and light theme, use the theme button at the bottom of the sidebar. See Sidebar.
Changing the Language
To change the language:
- On the Language page, in the Language list, select English or Türkçe.
The Client Panel switches to the selected language immediately.
Note
The sign-in page uses the language of your browser, not this setting.
Customizing the Terminal
The terminal settings apply to SSH, Telnet and Kubernetes sessions in the browser. A live preview on the right shows the result as you change the settings.
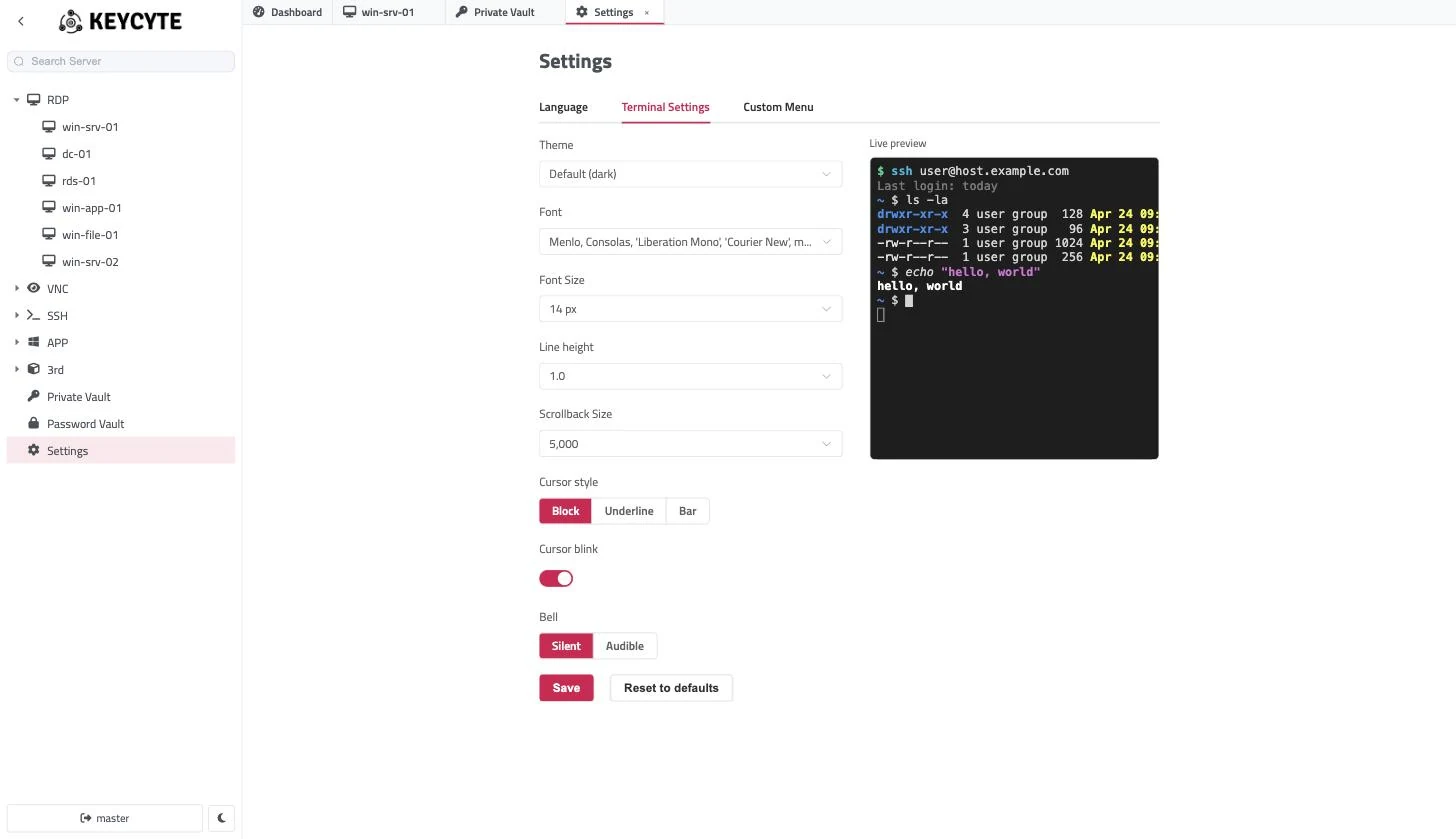
To customize the terminal:
-
Open the Terminal Settings page.
-
Change the settings:
Setting Description Default Theme The color scheme: Default (dark), Dark, Black, Light, Dracula, Solarized Dark, Solarized Light, Monokai or Nord. Default (dark) Font The font: System mono (Menlo / Consolas), JetBrains Mono, Fira Code, Source Code Pro, Ubuntu Mono, Cascadia Code, Hack or Browser default monospace. A font is used only if it is installed on your computer. System mono (Menlo / Consolas) Font Size From 10 px to 24 px. 14 px Line height The spacing between lines: 0.9, 1.0, 1.1, 1.2 or 1.4. 1.0 Scrollback Size The number of lines the terminal keeps for scrolling and searching: 1,000 to 50,000. 5,000 Cursor style Block, Underline or Bar. Block Cursor blink Makes the cursor blink. On Bell Silent, or Audible to play a sound when the remote system rings the terminal bell. Silent -
Click Save.
The settings apply to terminal sessions that you open after saving. To return to the default values, click Reset to defaults, and then click Save.
Organizing Servers in Custom Folders
On the Custom Menu page you create your own folders for the server tree, for example for the servers of one project. Custom folders appear at the top of the server tree, above the protocol folders. A server can be in a custom folder and in its protocol folder at the same time.
Creating a Folder
To create a folder:
- On the Custom Menu page, click Add.
- In Name, enter the folder name.
- Optionally, in Icon, select an icon for the folder.
- Click Save.
The folder appears in the list and in the server tree. If the name is reserved or already in use, a message shows the reason.
Adding Servers to a Folder
To add servers to a folder:
-
In the row of the folder, click Server.
The Select Servers panel opens and lists all servers you can access. The servers already in the folder are selected.
-
Optionally, type in the Search field to filter by name, address or protocol.
-
Select the servers that the folder must contain, and clear the ones it must not contain.
-
Click Save.
The server tree is updated.
Note
The selection replaces the contents of the folder. If you clear all servers and save, Keycyte PAM asks for confirmation and empties the folder.
Renaming a Folder or Changing Its Icon
To edit a folder:
- In the row of the folder, click Edit.
- Change the Name or Icon.
- Click Save.
Deleting a Folder
To delete a folder:
- In the row of the folder, click Delete.
- In the confirmation dialog, click Yes, Delete.
The folder is removed from the server tree. The servers themselves are not affected and remain in their protocol folders.